Tutorial: Using the WordPress REST API in OutSystems

Maybe you have a client who likes to have their blog posts on their website, and in a different format (of course, why not). Maybe you have a blog yourself, but simply wish to escape the WordPress theme drama and want to show off your blog posts on your OutSystems portfolio, like I do. But how do we get those blog posts on our OutSystems website? I have a WordPress blog, and I'm not particularly fond of the layout options I have there, but I really do like their post editing system. So I decided to create my blog posts on WordPress and transfer all my blog posts through the WordPress.com REST API to my own site afterwards. Before we go on, please do confirm whether your blog is on WordPress.com or WordPress.org. The two sites may have the same name, but they have different REST API URLs. I'm using Wordpress.com, but both should be fine for this tutorial; I'll provide both URLs once we get there. Let's get moving! First, go to the Logic tab in Service Studio. In the Integrations folder, you'll find the REST integrations; right-click it and select 'Consume REST Service'.
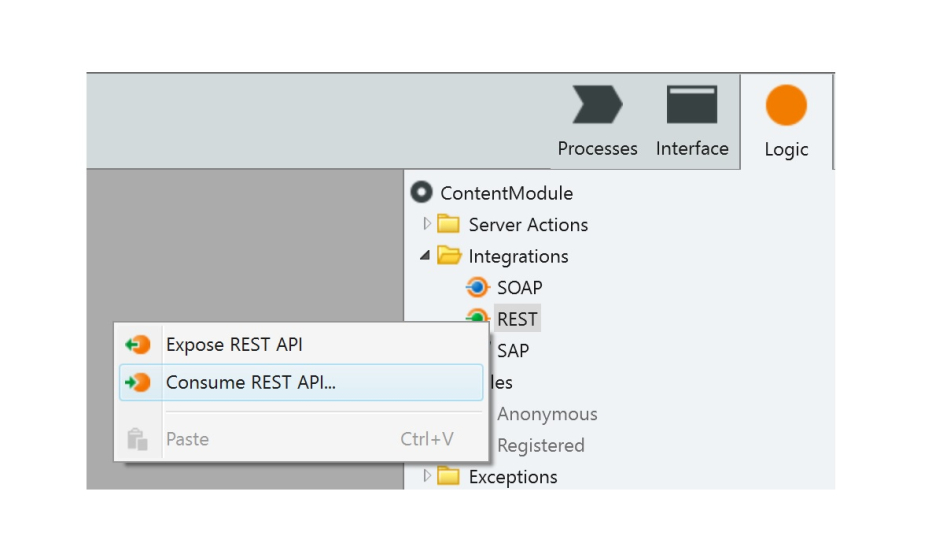
You'll get a popup box asking if we want to manually add a single method or if we want to automatically add all methods available. For now, we only want to GET a list of all of our blog posts, so let's select the 'single method' option. Now we get another popup box, allowing us to configure the REST API. We can skip straight to the 'Test' tab and enter our Method URL (the URL of the REST API).
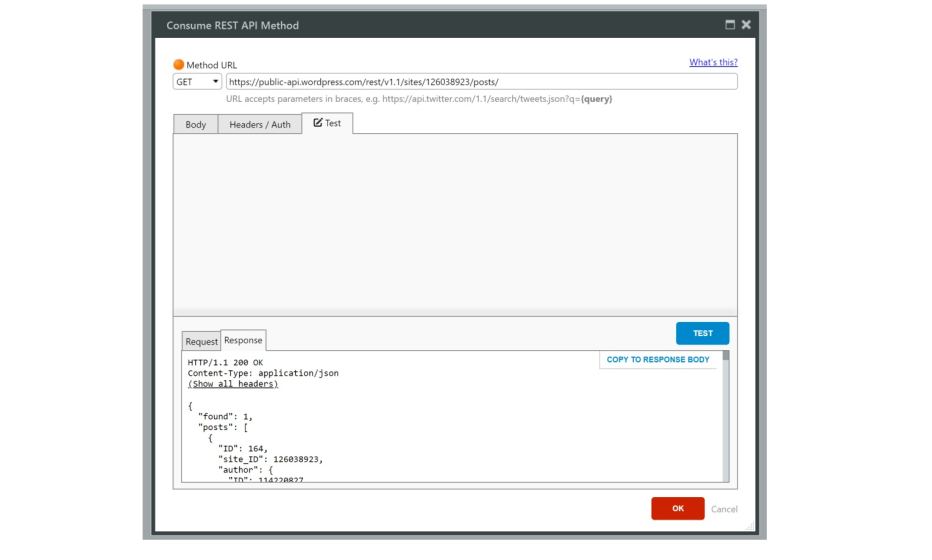
The correct URL differs. For WordPress.com sites, it's the following:
https://public-api.wordpress.com/rest/v1.1/sites//posts
For Wordpress.org sites, it's along the lines of this one:
http://.wp-api.org/wp-json/wp/v2/posts
(Note: can be either your domain ('example.blog') or an integer referring to the ID of your site.) After entering the correct URL, click the TEST button. If you get a 404, try tweaking the link a bit. When your test returns all the data you need, click on the 'COPY TO RESPONSE BODY'- button.
A Structure will be modeled to this response body upon clicking 'OK'.
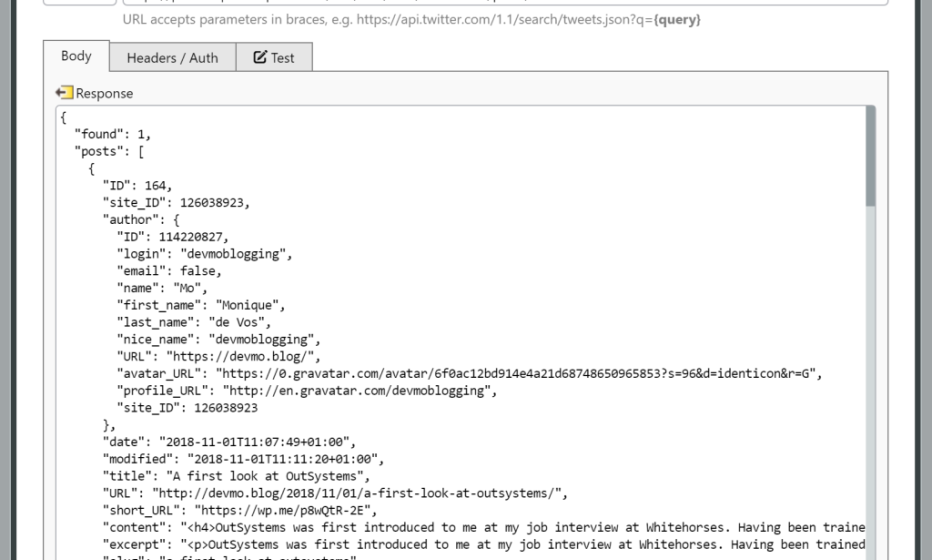
And there you have it, your very own WordPress REST API call! It's now an Action, and can be used as such. However, our Screen Preparation does not accept inserting REST API Actions directly. So first, let's make this call a bit more reusable by creating a New Server Action named 'GetBlogPosts'. Drag your newly created REST API into the Action between the Start and the End nodes, and drag an Assign into the Action Flow immediately after.
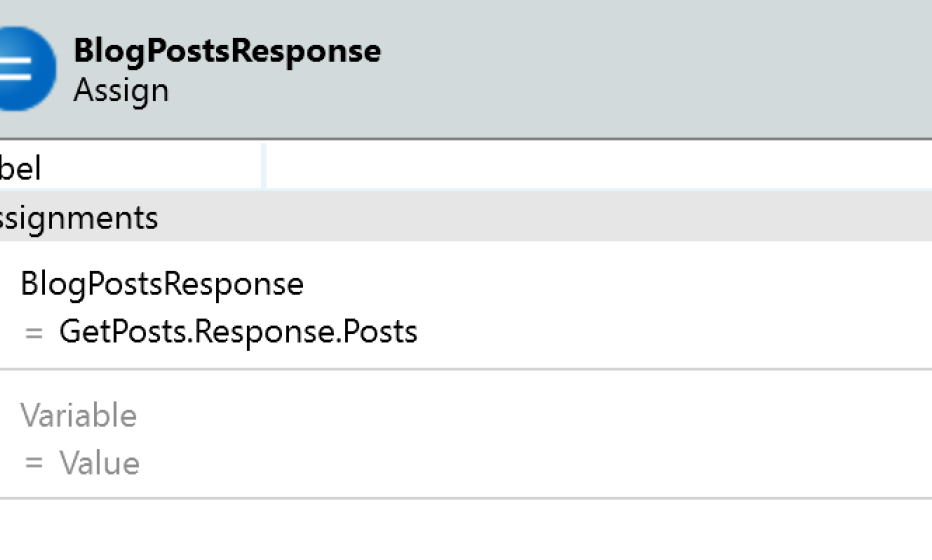
This assign will only function to copy the result list from your REST API into an Output Parameter, so create an Output Parameter for this action (right-click, Add Output Parameter) and set the Data Type to Post List ('List of Post' in the Data Type editor); let's call the Output Parameter 'BlogPostsResponse'. Then assign the REST API response to the OutputParameter. (We're almost done now!)
For the sake of this tutorial, I created a new blank Web Screen called 'Blog'. I put 'My Blog' into the Title placeholder. To display a list of our blog posts, we'll have to use our new Action, GetBlogPosts, in the Screen preparation. Add a Screen Preparation to the 'Blog' Screen and drag our Action into it:
Next, switch back to the Interface tab and the 'Blog' Screen and drag a List Records into the Main Content area. Usually, you could drag your Attributes straight into this list and be done with it, but because this is a REST API structure, we'll have to create the expressions within the List manually. Set the Source Record property of the List Records widget to 'GetBlogPosts.BlogPostsResponse', and drag an Expression into the List Records widget. Set the value to 'BlogPostRecordList.List.Current.Title' and add the Style Class 'Heading2'. Enclose the Expression in a Container and switch to the Widget Tree (Ctrl+W); drag another Container below our current one and put another Expression into it, setting the value to 'BlogPostRecordList.List.Current.Date' and setting the text color to a light grey. A final Container will contain the excerpt of our blog post; create a new container below the previous one, put an Expression into it with the value 'BlogPostRecordList.List.Current.Excerpt' and set the Escape Content property to 'No' (only use for your own blog posts, read here why!). Enclose all three in another Container, and give it the 'CardWhite' Style Class - just to make it look nice. I've also adjusted the container width to 8 col. You can make the Title link to a full blog post later, by linking it to a detail page, a popup or even the 'real' WordPress Site. Your Widget Tree will look like this,
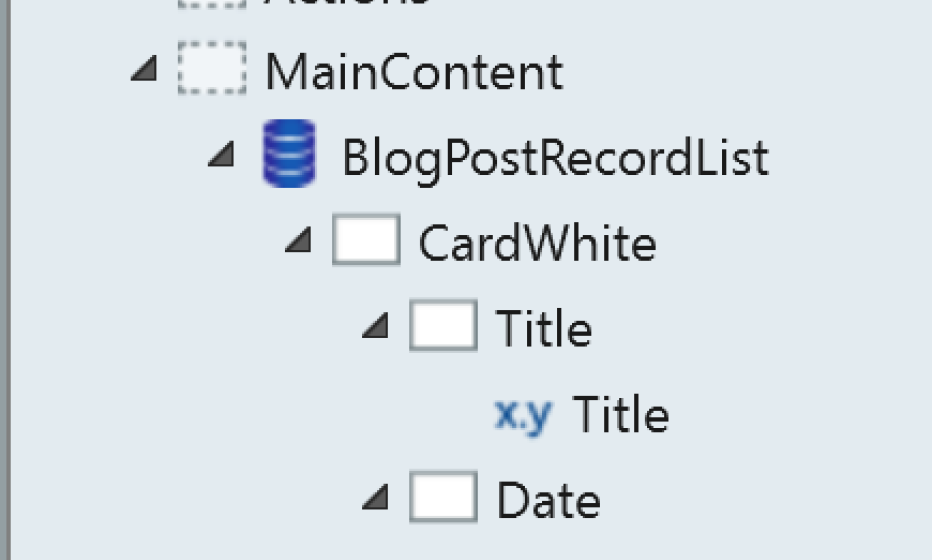
and your Screen will look somewhat like this:
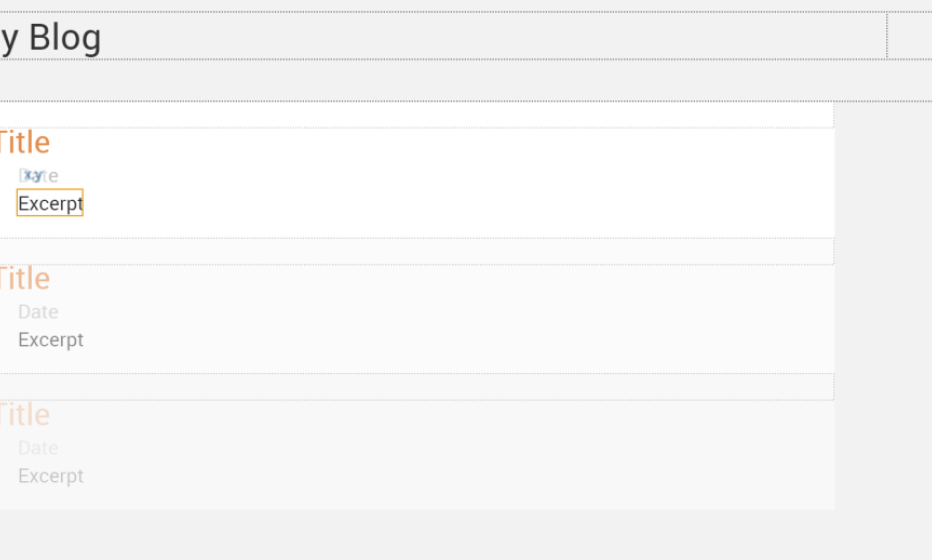
Now for the final test: Let's publish and find out what we've actually built...
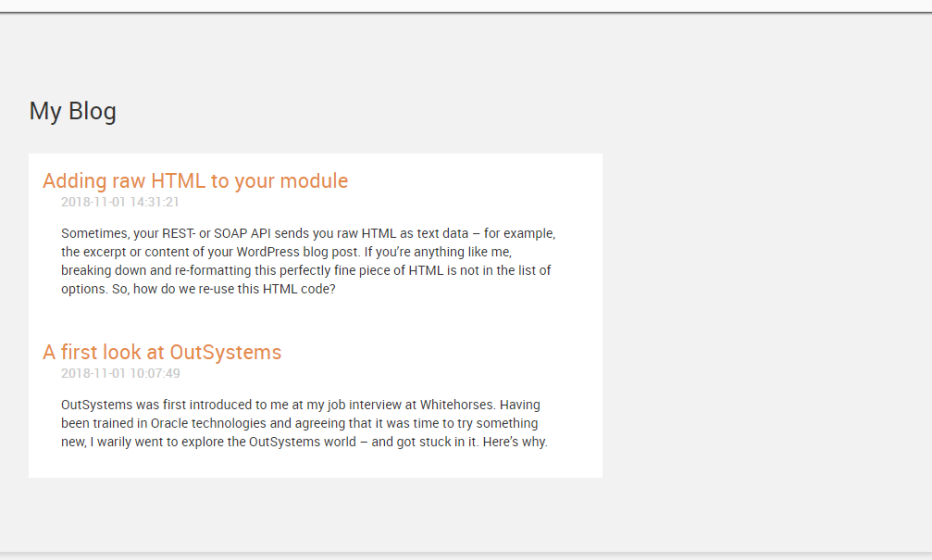
I don't know about you, but I think that's pretty rad! Now that we've successfully extracted our blog posts from our WordPress site, we can do all sorts of cool stuff with it or style it like we usually would - just like with 'normal' Entity data. For a reference of different WordPress.com API calls, check here, and a reference of the WordPress.org REST API can be found here. Try to experiment and have fun! See you in the next post!


